Author: The Prep Verdict

  • Best Emergency Water Filter for a Home Power Outage (Not a Backpacking Trip)

    The Prep Verdict Editorial Team
    ·
    Independently tested & researched
    Updated September 2026

    Quick Verdict: The complete home water system

    Best Primary Filter
    Survivor Filter Pro

    The active workhorse for volume and everyday household use.

    Best Backup
    Aquatabs

    A 100-tablet container that outlasts several emergencies before running out.

    Add a HydraPak Seeker+ Gravity Filter Kit as a hands-free backup filter that also stores the water it makes. Full system: under $250.

    If you’ve searched “best emergency water filter,” you’ve probably landed on a list of backpacking filters — the Sawyer Squeeze, the MSR Guardian, a Grayl bottle. Those are great products, but they’re built to solve a different problem: one person, filtering a liter at a time, on a trail. A multi-day outage at home is a household problem — several people, days at a time, and a water heater or a bathtub full of stored water instead of a stream.

    That’s the gap almost nobody online actually addresses. This isn’t a “here’s one filter, buy it” pick. It’s a system: an active filter for volume, a chemical backup for redundancy, and a hands-free second filter that handles storage too. Here’s how the pieces fit together, and which specific products we’d actually put in a household kit.

    How much water does your household actually need?

    Before picking a filter, size the problem. FEMA and the Red Cross both recommend one gallon of water per person, per day — half for drinking, half for cooking and basic hygiene — with at least a three-day supply as the floor, more if anyone in the household is pregnant, nursing, sick, or if you live somewhere hot. For a family of four, that is a minimum of 12 gallons sitting in reserve before you even get to filtration.

    Filtration matters for two reasons beyond that stored supply: it is what turns questionable water (a cloudy tap during a boil-water advisory, a rain barrel, a creek if things get bad enough) into something safe to drink, and it is your backup once the stored gallons run out.

    The three-piece system
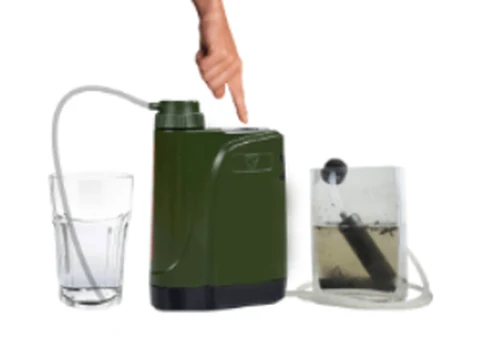
    Survivor Filter Pro X electric water filter in use, filtering water from a collection bag into a drinking glass
    Best for Price Key spec
    Survivor Filter Pro Active filtration — turns any questionable water source into drinking water on demand ~$65 to 70 0.01-micron triple-stage filter, 500 mL/min, rated for ~26,000+ gallons before replacement
    Aquatabs Cheap, shelf-stable chemical backup for when you do not want to pump, or the filter is tied up ~$8 to 15 per 100-tablet container One 397mg tablet treats 4 gallons in 30 minutes; 3-year shelf life
    HydraPak Seeker+ Gravity Filter Kit Hands-free backup filtration — filters water without pumping while doubling as your storage container $150 Dual-bag gravity system, 63mm filter removes 99.99% of bacteria/cysts, ~1,500L filter life, no pumping required

    None of these substitute for the others. The filter handles volume and works with almost any water source; the tablets are your zero-moving-parts backup (worth having even if you never plan to use them as your primary method — pumps can break, tablets cannot); and the gravity filter kit is your hands-free second filtration method, doubling as the container that holds the water it produces.

    Survivor Filter Pro — the workhorse

    The Survivor Filter Pro comes in two versions: a battery-powered electric pump (the one we link below and default to for a home kit) and a fully manual hand-pump model with the same core filtration for anyone who’d rather not depend on batteries. Either way it’s a pump-style filter, not a squeeze or straw filter, which matters for a home setup because it can process water faster than gravity alone without anyone sucking water through a straw for a whole household’s needs — the electric version does the pumping for you, while the manual version takes some arm strength but needs no power source.

    Key specs:

    • 0.01-micron triple-stage filtration (carbon, ultra-filter, cotton pre-filter) — finer than the 0.1-micron rating on most trail-focused competitors like the Sawyer Squeeze, which matters more for viruses and finer sediment than it does for bacteria alone.
    • 500 mL/min flow rate — slower than some hollow-fiber trail filters, but steady, and the carbon stage means it actually addresses taste and odor, not just pathogen removal.
    • Rated for roughly 26,000 gallons before the filter stages need replacing, which for a home-emergency-only use case (as opposed to daily use) is functionally a many-years supply.
    • Removes bacteria, protozoa, microplastics, heavy metals, and chemicals; effective against viruses as well — the broadest contaminant coverage of the three products here.

    The honest tradeoff: it’s heavier and slower than an ultralight trail filter, and the pre-filter clogs faster in visibly dirty or turbid water. For a home kit that’s mostly filtering stored or tap water rather than a muddy creek, that tradeoff barely matters. (Specs below are the official electric-model numbers, confirmed directly against the manufacturer’s listing for that SKU.)

    Check Price: Survivor Filter Pro (Electric) See the Manual Version

    Aquatabs — the backup that cannot break

    A pump has moving parts. Tablets do not. Aquatabs are NaDCC-based purification tablets, WHO-certified, and dead simple: one 397mg tablet treats 4 gallons of water in 30 minutes, with a 3-year shelf life so a box bought today is still good well past your next home inventory check. They eliminate 99.9999% of bacteria, 99.99% of viruses, and 99.9% of cysts.

    The honest pitch here is not “instead of a filter” — it is “in addition to one.” If the filter pump seizes, someone is out with it, or you just do not want to stand there pumping water for a family of five, drop a tablet in a jug and wait half an hour. At roughly a dime a tablet for the 4-gallon dose, keeping two or three containers in a kit is a rounding error next to the filter cost.

    Check Price: Aquatabs

    HydraPak Seeker+ Gravity Filter Kit — hands-free filtration that doubles as storage

    This is the piece most “best emergency filter” lists skip entirely: a way to filter in bulk without standing at a pump. Fill the kit’s “dirty” bag from a tap, rain barrel, or any questionable source, hang it, and gravity pushes the water through a 63mm Plug-N-Play filter cap into a “clean” bag you can pour or dispense straight from — no pumping, no batteries. The filter removes 99.99% of bacteria and parasitic cysts, is rated for roughly 1,500 liters before replacement, and flows at over a liter per minute, and the clean bag doubles as your storage container once filtration is done.

    Why add a second filter?

    The Survivor Filter Pro is faster for a quick refill, but it needs someone actively pumping. The Seeker+ Gravity Filter Kit is slower but hands-free — hang it and come back to clean water waiting in the attached bag. It is also real redundancy: if one filter clogs or breaks, you are not down to tablets alone.

    Check Price: HydraPak Seeker+ Gravity Filter Kit

    Building your kit: what we would actually buy

    For a household of 3-4 planning for a multi-day outage: one Survivor Filter Pro as the primary active filter, a 100-tablet Aquatabs container as backup (it will outlast several emergencies before it is used up), and a HydraPak Seeker+ Gravity Filter Kit as a hands-free second filtration method that also stores the water it produces. That is a complete system for under $250, on top of whatever gallons of stored water you are already keeping per the FEMA guidance above.

    FAQ

    How long does a Survivor Filter Pro last?
    The manufacturer rates the filter stages for roughly 26,000 gallons of use before replacement is needed — for occasional home-emergency use rather than daily filtration, that is typically a multi-year lifespan.

    Are Aquatabs safe to drink every day, or just in an emergency?
    Aquatabs are designed for emergency and travel water purification, not as a daily replacement for a home water treatment system. For short-term emergency use — days to a couple of weeks — they are an EPA-recognized approach to making questionable water safer to drink.

    Do I need both a filter and purification tablets?
    For a home kit, yes — treat them as redundant, not duplicate. A pump filter can jam or break; tablets have no moving parts to fail, but need 30 minutes of wait time and will not remove sediment or improve taste the way a filter does. Having both covers each one weak point.

    How much water should I store before I even need to filter anything?
    FEMA and the Red Cross recommend at least one gallon per person per day, with a minimum three-day supply — more if you can manage it, and more per person if anyone in the household is pregnant, nursing, or ill.

    Affiliate Disclosure

    The Prep Verdict is reader-supported. If you buy through a link on this page, we may earn a commission at no extra cost to you. See our full disclosure for details. We only recommend products we’d actually put in our own emergency supplies.


  • Freeze-Dried vs. Dehydrated vs. MRE: What Actually Lasts in Long-Term Food Storage

    Freeze-Dried vs. Dehydrated vs. MRE: What Actually Lasts in Long-Term Food Storage

    The Prep Verdict Editorial Team
    ·
    Independently tested & researched
    Updated September 2026

    Quick Verdict: What should make up your food storage?

    Best Base Layer
    Dehydrated staples (rice, beans, etc.)

    The strongest cost-per-calorie for the bulk of a long-term supply.

    Best for Taste & Nutrition
    Nutrient Survival (freeze-dried)

    A nutrition-forward freeze-dried option worth prioritizing for kids or health needs.

    MREs earn their place for grab-and-go and no-prep scenarios. See the full mix below.

    Search “long-term emergency food storage” and you’ll land almost entirely on the marketing pages of the brands selling it — buckets of freeze-dried entrees with a “25-year shelf life” banner and an “add to cart” button. What you won’t find easily is a straight answer to the question underneath the sale: freeze-dried, dehydrated, or MRE — which one is actually right for my household, and why do these three things get lumped together when they’re not the same product at all?

    They’re not interchangeable, and the differences aren’t cosmetic. They differ in how long they actually last, how much of the original nutrition survives processing, how much they weigh and how much room they take up, how they taste once you’re actually eating them instead of reading about them, how much water and fuel you need to prepare them, and — often overlooked — what they cost per calorie once you do the math instead of trusting the sticker price on a “family emergency kit.”

    This isn’t a sales pitch for one method. It’s the comparison we think is missing: a neutral look at what each food-storage method actually is, where each one earns its reputation and where it doesn’t, and a straightforward recommendation for which combination makes sense for a typical household — not a prepper compound.

    The three methods, side by side

    Freeze-Dried Dehydrated MRE (Meal, Ready-to-Eat)
    Typical shelf life (sealed, proper storage) ~25–30 years for many commercial pouches/cans ~15–25 years for commercially packaged, oxygen-absorbed cans; much shorter (1–5 years) for home-dehydrated food in basic packaging Typically 3–7 years for commercial “long-life” MREs stored cool; military-spec MREs are often rated closer to 3–5 years, shorter in hot storage
    Nutrition/calorie retention Generally the best of the three — sublimation preserves most vitamins, minerals, and structure; calorie density per prepared serving is comparable to the fresh original Good but measurably lower than freeze-dried — heat-based drying degrades more heat-sensitive vitamins (notably vitamin C and some B vitamins); calories remain, but the food is more concentrated/less voluminous per gram Fully cooked and formulated to a calorie target (often 1,200+ calories per meal) — nutrition is engineered for a ration, not necessarily “whole food” nutrient density
    Weight (per serving) Lightest of the three — ~90%+ of water weight removed Light, but generally slightly heavier/denser than freeze-dried per equivalent nutrition Heaviest — includes retort-pouch liquid/moisture, packaging, and sometimes a heater
    Bulk/storage space Compact; pouches and #10 cans stack efficiently Compact, similar to freeze-dried Bulkiest of the three per meal — thick retort pouches, more packaging overall
    Water needed to prepare Requires added hot or cold water to rehydrate (typically 1–2 cups per serving) Requires added water, often more soak/simmer time than freeze-dried to fully rehydrate None required to eat — most MRE entrees are edible cold straight from the pouch, though heating improves taste
    Prep effort Low — add water, wait, stir Low-to-moderate — often benefits from longer rehydration or light cooking to soften texture Lowest — no water, no heat source required, though a flameless heater (often included) improves the experience
    Taste/texture reputation Generally considered the closest to fresh food’s original texture once rehydrated — widely regarded as the best-tasting of the three shelf-stable categories Reputation is mixed — texture often comes out chewier/tougher than freeze-dried since some moisture and cell structure is lost to heat rather than sublimation; taste is generally fine but less “fresh-tasting” Reputation varies widely by manufacturer and menu item — some modern commercial MREs are genuinely good, others carry the old “military ration” reputation for being dense, salty, or monotonous over many meals
    Typical cost per serving/day Generally the most expensive per calorie among the three, though pricing varies a lot by brand and whether you buy sale/bulk pricing Usually the cheapest per calorie of the three, especially if home-dehydrating your own food rather than buying commercial pouches Mid-to-high — pricing is often close to or above freeze-dried on a per-meal basis, but you’re also paying for zero prep effort
    Storage requirements Cool, dry, dark storage extends shelf life meaningfully; sealed with oxygen absorbers ideally Same general storage rules; more sensitive to humidity re-entering the package if not resealed well Sensitive to heat — manufacturers generally warn that storage above ~75°F/24°C shortens shelf life substantially

    What each method actually is

    Freeze-dried food

    Antique-style illustration of a sealed emergency ration pouch and a bowl of reconstituted freeze-dried meal beside a wheat sheaf, evoking a vintage botanical field-guide plate

    Freeze-drying works by first freezing the food solid, then placing it in a vacuum chamber where the ice sublimates directly from a solid to a vapor without passing through a liquid state. That process removes somewhere in the neighborhood of 98–99% of the food’s moisture while leaving the food’s cellular structure largely intact — which is the core reason freeze-dried food tends to rehydrate closer to its original texture than dehydrated food does.

    Genuine pros:

    • Best nutrient retention of the three methods, since the low-temperature process is gentler on heat-sensitive vitamins than dehydration’s heat-based drying.
    • Texture and taste generally hold up best after rehydration — this is the method most commercial “gourmet” emergency-food brands lean on for that reason.
    • Long shelf life when properly packaged (typically the longest of the three, on paper).

    Genuine cons:

    • Requires specialized industrial equipment to produce — this is why it’s rarely a practical DIY method at home, unlike dehydrating.
    • Generally the most expensive of the three per calorie, since the equipment and process are more capital-intensive.
    • Still requires added water and a wait time to rehydrate before eating — not a zero-prep option like an MRE.

    Freeze-dried meal brands are the products most people picture when they hear “long-term food storage bucket,” and the category includes both large legacy players and newer entrants. Nutrient Survival is one freeze-dried option worth knowing about specifically because it markets itself around a higher-protein, more nutrition-forward formulation than some of the bulk-calorie buckets that dominate the category — a reasonable fit for someone who wants freeze-dried meals as an actual nutritional base layer, not just stored calories to survive on.

    Check Price: Nutrient Survival

    Dehydrated food

    Dehydration removes moisture using heat and airflow — a food dehydrator, an oven on low, or historically, sun and air. It’s the older, simpler, and far more accessible method: it’s genuinely practical to do at home with a basic countertop dehydrator, which is not true of freeze-drying.

    Genuine pros:

    • Much cheaper to produce, both commercially and at home — this is usually the lowest cost-per-calorie option of the three.
    • Accessible as a DIY method; you can dehydrate your own garden produce or bulk-bought food without industrial equipment.
    • Still shelf-stable for years when packaged well, especially commercially canned dehydrated food with oxygen absorbers.

    Genuine cons:

    • Heat-based drying degrades more nutrients than freeze-drying, particularly some vitamins.
    • Texture tends to come out tougher, chewier, or more shrunken than freeze-dried food — the cell structure collapses more under heat than it does under sublimation.
    • Shorter typical shelf life than freeze-dried, especially for home-dehydrated food in non-commercial packaging.

    MRE (Meal, Ready-to-Eat)

    An MRE is a fully cooked, fully shelf-stable complete meal, typically packaged in a retort pouch (the same basic packaging science as a shelf-stable pouch of tuna) that’s been heat-processed for preservation rather than dried at all. Because the food is already cooked and sealed, MREs need no water and no heat source to be eaten safely — you can eat one cold, straight from the pouch, though most people prefer them warmed.

    Genuine pros:

    • Zero prep required — no water, no cooking, no waiting. This is the method’s whole reason for existing.
    • Usually includes a complete meal (entree, side, snack, sometimes a dessert and a flameless heater) rather than a single component.
    • Genuinely useful for situations where you have no water to spare for rehydration and no way to heat anything.

    Genuine cons:

    • Shortest typical shelf life of the three, and shelf life drops further in hot storage — a garage or car trunk in summer is a bad long-term home for MREs.
    • Heaviest and bulkiest per meal, which matters if you’re storing months’ worth or need to carry any of it.
    • Reputation for taste and variety is mixed and brand-dependent; a “meals get old fast” complaint shows up often for anyone eating the same MRE case repeatedly.

    MREs are the one category on this page where The Prep Verdict doesn’t currently have an affiliate merchant tied to Pillar 2 — they’re covered here for the honest comparison, not to sell one.

    Which should you actually buy

    There isn’t one universally correct answer — the right mix depends on budget, storage space, and what scenario you’re actually planning for — but a few sensible defaults:

    For most households, dehydrated and commercially canned freeze-dried food together make the strongest base layer. Dehydrated (or a mix of dehydrated staples like rice, beans, and freeze-dried proteins) gives you the best cost-per-calorie for the bulk of a long-term supply, while a smaller stock of freeze-dried meals covers the days when nobody has the energy to cook from scratch and you want something that tastes closer to a real meal with minimal effort.

    Freeze-dried is worth prioritizing if nutrition quality and taste matter more to you than squeezing the lowest cost per calorie — for households with kids, anyone managing a health condition where nutrition quality matters, or simply for the person who knows that food nobody wants to eat during a stressful week isn’t actually “stored food,” it’s wasted money. This is where a nutrition-forward option like Nutrient Survival fits — as a higher-quality freeze-dried component of a broader plan, not the entire plan by itself.

    Check Price: Nutrient Survival

    MREs earn a place for a specific job, not as your whole pantry: grab-and-go situations, a car kit, a go-bag, or any scenario where you genuinely might not have water or a way to heat food. Buying a full year of calories exclusively in MREs is usually the wrong call for a stationary home supply — the cost and bulk don’t justify it when water and a stove are almost always available at home.

    Budget tier: bulk dry staples (rice, beans, oats, canned goods) plus home or commercially dehydrated produce as your calorie base, with a modest supply of freeze-dried meals for variety and effort-free days.

    Premium tier: a larger stock of quality freeze-dried meals as the primary base, supplemented by dehydrated staples for bulk calories and a small MRE stash specifically for a go-bag or vehicle kit.

    FAQ

    What’s the actual shelf-life difference between freeze-dried and dehydrated food?
    Commercially packaged freeze-dried food is generally rated for a longer shelf life than commercially packaged dehydrated food — often quoted in the 25-plus-year range versus 15–25 years for dehydrated — but both numbers depend heavily on packaging quality (oxygen absorbers, proper sealing) and storage conditions (cool, dry, dark). A poorly stored freeze-dried pouch can fail well before a well-stored dehydrated one does.

    Is freeze-dried food actually healthier than dehydrated food?
    Freeze-drying generally preserves more of the original nutrient content because it uses a lower-temperature process than heat-based dehydration, which does degrade some heat-sensitive vitamins. Both methods retain the food’s calories and most of its protein, fat, and minerals — the meaningful difference is mainly in a subset of vitamins and in texture, not in whether the food is “healthy” in a broad sense.

    Can I just live on MREs during a long-term emergency?
    You could survive on them, but it’s not the ideal approach for a multi-week or multi-month situation at home. MREs are formulated for short-term, high-activity use (originally military field rations) rather than long-term daily nutrition, and their cost and bulk per calorie make them an inefficient primary food source once you’re past the first few days of an emergency.

    Do I need to add water to freeze-dried meals, or can I eat them dry?
    Freeze-dried meals are designed to be rehydrated with water — typically hot water for the best texture and to shorten wait time, though cold water works for most products with more soak time. Eating a freeze-dried meal dry is generally not the intended use and will taste and feel very different from a properly rehydrated serving.

    How much water should I plan for if my food storage is mostly freeze-dried or dehydrated?
    As a rough planning figure, budget roughly 1 to 1.5 cups (8–12 oz) of water per rehydrated serving for a full meal — single-ingredient items like freeze-dried fruit typically need less — on top of your household’s regular drinking water needs. Always check the specific product’s package for its exact ratio. This is one more reason food storage and water storage should be planned together rather than treated as separate line items — see our water storage and filtration content for the full picture.

    Is it worth mixing all three methods instead of picking just one?
    For most households, yes. Each method covers a different weakness in the others: dehydrated and bulk staples give you the cheapest calories for the bulk of your supply, freeze-dried gives you better nutrition and taste for the meals where that matters most, and a small MRE stash covers the no-water, no-heat, grab-and-go scenario that neither of the other two handles well.

    Affiliate Disclosure

    The Prep Verdict is reader-supported. If you buy through a link on this page, we may earn a commission at no extra cost to you. See our full disclosure for details. We only recommend products we’d actually put in our own emergency supplies.
  • Water Purification Tablets vs. Filters: Which Do You Actually Need for a 2-Week Power Outage?

    The Prep Verdict Editorial Team
    ·
    Independently tested & researched
    Updated September 2026

    Quick Verdict: Tablets, filter, or both?

    Best Primary
    Survivor Filter Pro

    Handles volume and anything that isn’t perfectly clear water.

    Best Backup
    Aquatabs

    Zero-maintenance tablets for when the filter is busy, broken, or overkill.

    Pair both with a HydraPak Seeker+ Gravity Filter Kit — a hands-free backup filter that also stores the water it makes. See the full breakdown below.

    Search “water purification tablets vs. filter” and most of what comes back is written for someone standing next to a stream with one water bottle — a hiker deciding what to clip to a backpack. That’s a real comparison, but it isn’t your comparison. If the power’s out for a week or two, you’re not filtering a liter at a time on a trail. You’re a household — maybe one person, maybe five — trying to make sure everyone has safe water to drink, cook with, and brush their teeth with, for as long as this lasts, using whatever’s already in your stored reserve plus whatever you can pull from a tap, a rain barrel, or a pool if it comes to that.

    That changes the question. It’s not “which one is better.” It’s “which one handles my situation” — and for most households facing a real multi-day-to-two-week outage, the honest answer is some of both, in different roles. This guide walks through the actual decision: when a tablet is the right tool, when you need a filter, when you need both, and how to think about storing and moving the water once it’s safe to drink.

    If you’ve already decided you need a filter and want the deep dive on a specific model, our Best Emergency Water Filter for a Home Power Outage (Not a Backpacking Trip) article covers the Survivor Filter Pro, Aquatabs, and the HydraPak Seeker+ Gravity Filter Kit in full detail — this guide is the shorter, decision-first companion to that one.

    The real question isn’t “tablets or filter” — it’s “what does my water need, and how much time do I have?”

    Tablets and filters aren’t competing products. They solve overlapping but different problems, and a two-week outage usually throws multiple problems at you over the course of those two weeks — which is exactly why most households end up wanting both rather than picking one and hoping it covers everything.

    Here’s the quick logic:

    Reach for tablets when:

    • The water is already clear (a stored jug, a municipal tap under a boil-water advisory, a questionable-but-clean-looking source) — tablets don’t remove sediment or particles, so they work best on water that’s already visually clean.
    • You have 30 minutes to spare before you need to drink it. Tablets aren’t instant.
    • You want a zero-effort, zero-moving-parts backup that can sit in a drawer for years without maintenance.
    • You’re outfitting more than one kit (car, go-bag, home supply) cheaply — tablets are the least expensive way to cover all of them.

    Reach for a filter when:

    • The water is cloudy, turbid, or has visible particles — pool water, a rain barrel with debris, a creek if you’re that far into an emergency. Tablets alone won’t clear that up and may work less reliably in murky water; a filter physically removes what’s making it cloudy.
    • You need water now and can’t wait out a treatment time.
    • You’re processing volume — several gallons a day for a household, not a single bottle.
    • You want something reusable that doesn’t run out the way a finite box of tablets does.

    Use both when:

    • This is the realistic default for most households in a multi-day-to-two-week scenario. Filter first for volume and speed; keep tablets as the backup for when the filter’s tied up, breaks, or you’re dealing with a batch of water while the filter is busy with another. Redundancy matters more the longer an outage runs — day 3 is forgiving if something breaks, day 10 is not.

    Scenario walkthrough: match the tool to the situation

    Scenario What we’d reach for Why
    Boil-water advisory, tap still runs, water looks clear Tablets Clear water, no urgency for volume, cheapest option
    Rolling outage, stored jugs running low, need several gallons fast for cooking + drinking for a family Filter Volume and speed matter more than cost per gallon here
    Rain barrel or pool water as a last-resort source, visibly cloudy Filter first, tablets optional afterward as extra insurance Filter removes particulate a tablet can’t touch
    Car emergency kit, go-bag, or a supply you’re unlikely to ever open Tablets No maintenance, no risk of a pump seizing up unused for years
    Two-week outage, single household, planning realistically Both Redundancy — one covers the other’s failure mode

    Tablets vs. filter: the practical comparison

    This isn’t a spec-sheet shootout of one filter against one tablet brand — it’s the categories that actually decide which one fits your situation.

    Purification tablets (e.g. Aquatabs) Portable filter (e.g. Survivor Filter Pro)
    Speed Slow — typically ~30 minutes wait time before the water is safe to drink Fast — filtered as you pump, ready immediately
    Effort Minimal — drop in, wait Low to moderate — the linked model is battery-powered, so it’s mostly setup rather than physical effort (a fully manual hand-pump version is also available if you’d rather not depend on batteries)
    Cost per treated gallon Low — a box of tablets treats many gallons for a modest upfront cost Higher upfront cost, but drops toward near-zero per gallon over the filter’s rated lifespan
    What it removes Bacteria, viruses, and cysts (chemically) — does not remove sediment, turbidity, heavy metals, or improve taste/odor Bacteria, protozoa, and (depending on model) viruses, plus sediment, some heavy metals and chemicals, and generally improves taste via a carbon stage
    Failure modes Water must be visually clear first; wait time can’t be rushed; won’t fix murky or foul-tasting water Pre-filter can clog in visibly dirty water; it’s a mechanical device with moving parts that can wear out or need cleaning
    Shelf life / lifespan Long shelf life (commonly cited around 3 years unopened) sitting in a drawer with no maintenance Long usable lifespan measured in total gallons filtered rather than calendar time, but needs periodic care (rinsing, replacement stages) to keep performing

    Where tablets do the job on their own

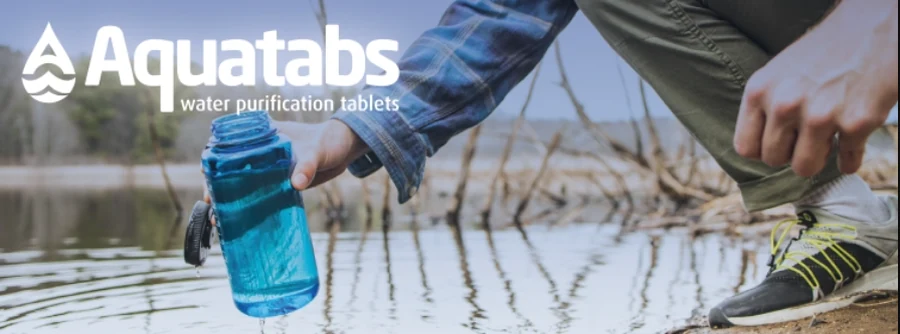
    Person crouched at a lakeshore filling a water bottle with Aquatabs water purification tablets

    Aquatabs are the tablet product tied to this site, and the case for them is simple: they’re the cheapest, lowest-effort way to make already-clear water safer to drink, they take up almost no space, and they don’t have anything that can break sitting in a drawer for years. For a boil-water advisory, a car kit, or a backup you hope to never use, they’re close to the ideal tool — the tradeoff is the wait time and the fact that they do nothing for water that’s cloudy or full of sediment.

    We go deep on Aquatabs’ specifics — treatment ratio, wait time, what pathogens they address — in the sibling filter article linked above. The short version for this piece: keep a container in every kit (home, car, go-bag) because the cost of doing so is trivial next to the value of a backup treatment method that can’t jam or wear out.

    Check Price: Aquatabs

    Where a filter earns its keep

    Survivor Filter Pro X electric water filter in use, filtering water from a collection bag into a drinking glass

    A filter — specifically the Survivor Filter Pro, the model we’ve tested and reviewed in depth on this site — is the right call whenever volume or turbidity is the problem tablets can’t solve: cloudy water, a household’s worth of gallons needed in a hurry, or a situation where waiting 30 minutes per batch just doesn’t scale. It’s also reusable in a way a box of tablets isn’t, which matters if an outage runs long enough that you’d otherwise be watching a tablet count tick down.

    The tradeoff versus tablets is upfront cost and depending on a power source — this is the electric-pump version, so it runs on batteries rather than muscle, and the pre-filter stage needs attention if you’re running visibly dirty water through it repeatedly. If you’d rather not rely on batteries at all, Survivor Filter Pro also comes in a fully manual hand-pump version with the same core filtration — a solid no-power backup-to-the-backup option, linked below alongside the electric model.

    Electric or manual?

    We link the electric-pump version below since it’s the one we’d default to for a home kit, but a fully manual hand-pump model is available too if you’d rather not depend on batteries.

    Check Price: Survivor Filter Pro (Electric) See the Manual Version

    The piece most guides skip: a hands-free filter that doubles as storage

    Treating water is usually framed as one job: pump it or drop a tablet in, done. But once you are filtering for a household over multiple days, hands-free capacity starts to matter — you do not want to stand at a pump for twenty minutes every time someone needs a refill. The HydraPak Seeker+ 6L Gravity Filter Kit solves that with a dual-bag gravity system: fill the “dirty” bag from a tap, rain barrel, or any questionable source, hang it, and gravity pushes the water through a 63mm filter cap into a “clean” bag you can pour or dispense straight from — no pumping required.

    The filter itself removes 99.99% of bacteria and parasitic cysts, is rated for roughly 1,500 liters before it needs replacing, and flows at over a liter per minute. That makes it a genuine second filtration method rather than just somewhere to put water after the Survivor Filter Pro has already treated it — and the clean bag doubles as your storage vessel, so there is no separate reservoir to buy on top of it.

    Why add a second filter?

    The Survivor Filter Pro is faster for a quick refill, but it needs someone actively pumping. The Seeker+ Gravity Filter Kit is slower but hands-free — hang it before bed or before tackling other chores, and come back to clean water waiting in the attached bag. It is also real redundancy: if one filter clogs or breaks, you are not down to tablets alone.

    Check Price: HydraPak Seeker+ Gravity Filter Kit

    Building your kit: the bottom line

    For most households planning realistically for a multi-day-to-two-week outage, the answer isn’t “tablets or a filter” — it’s a small system where each piece covers the other’s weak point:

    • A filter (Survivor Filter Pro) as your primary method for volume and for handling anything that isn’t perfectly clear.
    • Tablets (Aquatabs) as the zero-maintenance backup for when the filter’s busy, broken, or you just don’t want to pump water for a quick single batch.
    • A gravity filter that doubles as storage (HydraPak Seeker+ Gravity Filter Kit) as a hands-free backup filtration method for bulk volume, with the clean water it produces held in the same bag rather than a separate container.

    That’s a complete system, not a single purchase decision — and building it out costs far less than most people assume relative to the actual risk of a multi-day outage. See the sibling article linked above for the specific product breakdown, pricing, and our full take on each piece.

    FAQ

    Do I really need both tablets and a filter, or is that just upselling?
    For a short outage (a day or two) with clean stored water, either one alone can cover you. The case for both strengthens the longer an outage runs and the more sources you might end up relying on — redundancy matters more on day 10 than day 2, and the two methods fail in different ways, so having both means one covers the other’s blind spot.

    Can I use purification tablets on cloudy or muddy water?
    Not reliably. Tablets are a chemical treatment for pathogens — they don’t remove sediment, turbidity, or improve taste, and cloudy water can also make the chemical treatment less effective. If a source looks dirty, filter it first (or find a clearer source) before treating it with tablets.

    Which one is cheaper in the long run, tablets or a filter?
    Tablets have a lower upfront cost but a real per-use cost that adds up over time and eventually run out. A filter costs more upfront but the cost per gallon drops sharply over its rated lifespan since it’s reusable rather than consumable. For most households, the practical answer is to own both rather than optimize purely for cost — they’re not interchangeable enough to treat as a straight cost comparison.

    How fast does each one actually work?
    A filter produces drinkable water as you pump it — there’s no wait. Tablets need time to work, commonly around 30 minutes, before the water is safe to drink. If you need water in a hurry, that difference alone often decides which one you reach for.

    What about boiling — do I even need tablets or a filter if I can just boil water?
    Boiling is effective against biological contaminants and is a legitimate backup method if you have a reliable heat source and enough time and fuel. It doesn’t remove sediment or chemical contaminants the way a filter can, and it requires fuel and time that may be scarce during an extended outage — which is why it’s a good backup to know, not a full substitute for having tablets or a filter on hand.

    Do I need a separate container to store treated water?
    Not if you use a gravity filter kit like the HydraPak Seeker+ — its “clean” bag holds the water it produces, so filtration and storage happen in the same product. If you are filtering or treating water some other way, any clean, food-safe, sealed container works for short-term storage.

    Affiliate Disclosure

    The Prep Verdict is reader-supported. If you buy through a link on this page, we may earn a commission at no extra cost to you. See our full disclosure for details. We only recommend products we’d actually put in our own emergency supplies.